Goat milk chapstick has gained significant popularity in recent years as more people turn to natural and organic beauty products. In a world inundated with synthetic ingredients and harsh chemicals, the allure of a soothing and nourishing lip balm made from the pure goodness of goat milk is hard to resist. In this comprehensive guide, we will delve into the numerous benefits of goat milk chapstick, provide detailed instructions on how to make it at home, and even share the precise amounts of ingredients needed for a successful batch.
Goat milk chapstick offers a wide array of benefits for lip health and overall beauty. Its natural and nourishing properties make it a popular choice among those seeking a gentle and effective solution for dry, chapped, or aging lips. In this section, we will explore the numerous advantages of using goat milk chapstick.
Moisturizing Properties for Dry and Chapped Lips
Dry and chapped lips can be uncomfortable, painful, and even embarrassing. When the delicate skin of the lips becomes dehydrated, it can lead to flaking, cracking, and discomfort. Goat milk chapstick is a fantastic remedy for dry lips due to its exceptional moisturizing properties.
Goat milk is rich in natural fats, such as fatty acids and triglycerides, which are easily absorbed into the skin. These nourishing components penetrate deep into the lips, providing intense hydration and restoring moisture balance. The result is soft, supple, and rejuvenated lips that are free from dryness and discomfort.
Soothing and Healing Effects for Irritated Lips
Many individuals experience irritation and inflammation on their lips due to various factors, such as harsh weather conditions, exposure to irritants, or allergic reactions. Goat milk chapstick offers soothing and healing effects to calm and alleviate these concerns.
Goat milk contains anti-inflammatory properties that help to reduce redness, swelling, and irritation on the lips. It contains natural compounds, including vitamins A and C, which are known for their healing properties. These vitamins work together to repair damaged skin cells, promote cell regeneration, and accelerate the healing process of the lips.
Whether your lips are irritated from exposure to the sun, wind, or aggressive lip products, goat milk chapstick can provide relief and help restore your lips’ natural health and vitality.
Anti-Aging Effects for Youthful Lips
As we age, our lips undergo changes just like the rest of our skin. Fine lines, wrinkles, loss of volume, and a decrease in elasticity are common signs of aging that affect the lips. Goat milk chapstick can help combat these signs and keep your lips looking youthful.
One of the key components in goat milk that contributes to its anti-aging effects is alpha-hydroxy acids (AHAs). AHAs gently exfoliate the skin, sloughing off dead cells and promoting the growth of new, fresh cells. By using goat milk chapstick regularly, you can encourage the renewal of the lip’s surface, reducing the appearance of fine lines and wrinkles.
Furthermore, goat milk is rich in antioxidants, including vitamins A and E, which help protect the lips from free radicals. Free radicals are unstable molecules that contribute to premature aging and oxidative stress. By neutralizing these harmful molecules, goat milk chapstick helps to keep your lips looking plump and youthful.
In conclusion, goat milk chapstick offers a range of benefits for your lips. Its moisturizing properties combat dryness and chapped lips, while its soothing and healing effects provide relief from irritation. Additionally, its anti-aging properties help maintain the youthfulness of your lips. By incorporating goat milk chapstick into your daily lip care routine, you can enjoy nourished, healthy, and beautiful lips.
Detailed Instructions for Making Goat Milk Chapstick
Making your own goat milk chapstick is a rewarding and fulfilling DIY project that allows you to customize the ingredients and create a lip balm tailored to your preferences. In this section, we will provide you with detailed instructions on how to make goat milk chapstick from scratch, ensuring a successful and enjoyable homemade creation.
Gathering the Ingredients and Materials
Before you begin, gather all the necessary ingredients and materials. Here’s what you’ll need:
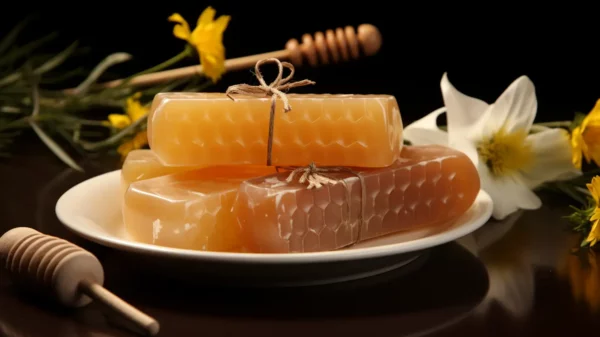
- Goat Milk: Choose fresh, high-quality goat milk. You can obtain it from local farmers or specialty stores that offer organic and pure goat milk.
- Beeswax: Beeswax acts as a natural emollient and helps solidify the chapstick. Opt for organic and unrefined beeswax for the best results.
- Carrier Oils: Select carrier oils that are nourishing for the lips, such as coconut oil, almond oil, or jojoba oil. These oils add moisture and enhance the texture of the chapstick.
- Essential Oils (Optional): If you desire a scented chapstick, you can add a few drops of essential oils for fragrance and additional benefits. Popular choices include lavender, peppermint, or citrus essential oils.
In addition to the ingredients, you’ll need the following tools and equipment:
- Double Boiler: A double boiler is essential for melting and combining the ingredients gently. If you don’t have a double boiler, you can create one by placing a heat-resistant bowl over a pot of simmering water.
- Lip Balm Tubes or Small Jars: Prepare clean and sterilized lip balm tubes or small jars to pour the chapstick mixture into.
- Stirring Utensils: Use a heat-resistant spatula or spoon for stirring the ingredients.
- Scale or Measuring Cups: Accurate measurements are important for successful homemade chapstick. Use a scale or measuring cups to measure the ingredients precisely.
Detailed Amount of Ingredients for Goat Milk Chapstick
Creating a perfect batch of goat milk chapstick requires precise measurements of each ingredient. The right proportions ensure the desired consistency, texture, and effectiveness of the final product. In this section, we will provide you with the detailed amounts of ingredients needed to make a successful batch of goat milk chapstick.
Proportions of Key Ingredients in Goat Milk Chapstick
The following are recommended ratios for the main ingredients in goat milk chapstick:
- Goat Milk: Use approximately 1 tablespoon (15 ml) of goat milk for every batch of chapstick. This amount provides enough moisture and nourishment for the lips without making the chapstick too runny.
- Beeswax: The amount of beeswax needed depends on the desired firmness of the chapstick. For a standard consistency, use around 1 tablespoon (15 grams) of beeswax. Increase or decrease the amount as per your preference.
- Carrier Oils: Use approximately 2 tablespoons (30 ml) of carrier oils, such as coconut oil, almond oil, or jojoba oil. These oils contribute to the smoothness and moisturizing properties of the chapstick. Adjust the amount based on your desired level of hydration.
- Essential Oils (Optional): If you choose to add essential oils for fragrance, use about 5-10 drops per batch. This provides a subtle and pleasant scent to your chapstick. Adjust the amount based on your preference for scent intensity.
It’s important to note that these proportions are general guidelines, and you may need to adjust them based on factors such as climate, personal preference, and the desired texture of your chapstick. Experimenting with different ratios can help you find the perfect balance that suits your specific needs.
Recommended Sources for High-Quality Ingredients
To ensure the best results for your goat milk chapstick, it’s essential to source high-quality ingredients. Here are some recommended sources for each key ingredient:
- Goat Milk: If you don’t have access to fresh goat milk from your own goats, consider purchasing it from local farms or farmers’ markets. Look for suppliers that offer organic and pure goat milk without any additives or preservatives.
- Beeswax: Seek out organic and unrefined beeswax from reputable beekeepers or specialty stores. This ensures that the beeswax is of high quality and free from chemicals or impurities.
- Carrier Oils: Choose cold-pressed or organic carrier oils from trusted brands or suppliers. Look for oils that are specifically labeled for cosmetic use and are free from additives or synthetic fragrances.
- Essential Oils: When selecting essential oils for your chapstick, opt for pure and therapeutic-grade oils. Look for brands that provide detailed information about the sourcing and extraction methods of their essential oils. This ensures that you are using high-quality oils that retain their beneficial properties.
By using high-quality ingredients, you can enhance the effectiveness and overall quality of your homemade goat milk chapstick. Taking the time to source the best ingredients will result in a lip balm that nourishes and protects your lips naturally.
As you embark on your goat milk chapstick-making journey, remember that these amounts and sources are just recommendations. Feel free to adjust the proportions and explore different ingredient combinations to create a lip balm that suits your personal preferences and lip care needs.
In the next section, we will conclude our comprehensive guide on goat milk chapstick, summarizing the benefits, instructions, and ingredient amounts discussed throughout this blog post. So, let’s wrap up this informative journey and leave you with the knowledge and inspiration to create your own nourishing goat milk chapstick.
Step-by-Step Guide to Making Goat Milk Chapstick
Now that you have all the ingredients and equipment ready, follow these step-by-step instructions to make your own goat milk chapstick:
- Measure the Ingredients: Start by measuring the desired amounts of goat milk, beeswax, carrier oils, and essential oils (if using). The proportions may vary based on personal preference and the desired consistency of the chapstick.
- Melt the Beeswax: Place the beeswax in the top part of the double boiler and heat it over low heat until it completely melts. Stir occasionally to ensure even melting and prevent any burning.
- Add the Goat Milk and Carrier Oils: Once the beeswax has melted, slowly add the goat milk and carrier oils to the double boiler. Stir gently to combine all the ingredients thoroughly. Continue heating until the mixture is smooth and well-blended.
- Optional: Add Essential Oils: If desired, this is the time to add a few drops of your chosen essential oils for fragrance. Stir well to distribute the scent evenly throughout the mixture.
- Pour into Containers: Carefully pour the chapstick mixture into the prepared lip balm tubes or small jars. Fill them to the desired level, leaving a small space at the top for easy application.
- Allow to Cool and Solidify: Place the filled containers in a cool, dry area and let them sit undisturbed until the chapstick solidifies completely. This process may take a few hours, so exercise patience and resist the temptation to touch or move the containers prematurely.
- Label and Store: Once the chapstick has solidified, label the containers with the ingredients and date. Store them in a cool place away from direct sunlight to maintain their quality and effectiveness.
Safety Precautions and Tips for Successful Homemade Goat Milk Chapstick
While making your own goat milk chapstick is a fun and creative process, it’s important to follow these safety precautions for the best results:
- Sterilize Equipment: Before starting, ensure that all equipment, including the double boiler, containers, stirring utensils, and measuring tools, are thoroughly cleaned and sterilized. This will help prevent contamination and extend the shelf life of your chapstick.
- Perform Allergen Patch Tests: If you or anyone who will be using the chapstick has known allergies, it is essential to perform patch tests before applying it to the lips. Apply a small amount of the chapstick to the inner arm and wait for 24 hours to check for any adverse reactions.
- Adjust Ingredient Amounts: Feel free to adjust the amounts of the ingredients according to your preferences. You can experiment with different ratios to achieve the desired consistency and level of moisturization.
- Choose High-Quality Ingredients: Opt for high-quality, organic ingredients to ensure the best results. This includes fresh goat milk, pure beeswax, and carrier oils that are free from additives or synthetic fragrances.
- Storage and Shelf Life: Store your homemade goat milk chapstick in a cool place, away from heat and direct sunlight. It is recommended to use the chapstick within six months to ensure its freshness and efficacy.
By following these detailed instructions and safety precautions, you can create your very own nourishing goat milk chapstick that will keep your lips moisturized, protected, and beautifully soft. In the next section, we will explore the precise amounts of ingredients needed to achieve the perfect balance for your homemade chapstick. So, let’s continue our journey of creating a personalized lip balm that will leave your lips feeling pampered and cared for.
Conclusion
In this comprehensive guide, we have explored the world of goat milk chapstick, its benefits, detailed instructions for making it at home, and the precise amounts of ingredients needed for a successful batch. Goat milk chapstick offers a natural and nourishing solution for dry, chapped, and aging lips. Its moisturizing properties help to hydrate and nourish the lips, while its soothing and healing effects provide relief from irritation. Additionally, the anti-aging properties of goat milk chapstick help to combat signs of aging and keep your lips looking youthful.
By following the detailed instructions provided, you can create your very own goat milk chapstick tailored to your preferences and specific lip care needs. Remember to gather high-quality ingredients, sterilize your equipment, and adjust the proportions to achieve the desired consistency and level of moisturization. Whether you choose to add essential oils for fragrance or keep it simple and unscented, the choice is yours.
Homemade goat milk chapstick not only allows you to take control of what you apply to your lips but also provides a cost-effective and environmentally friendly alternative to store-bought options. You can feel confident knowing the exact ingredients that go into your lip balm, free from harsh chemicals or synthetic additives.
So, why not embark on this delightful journey of creating your very own nourishing goat milk chapstick? Enjoy the process of making something with your own hands that will leave your lips feeling pampered, cared for, and naturally beautiful.
Remember to store your homemade chapstick in a cool place, away from heat and direct sunlight, to maintain its quality and effectiveness. Use the chapstick within six months to ensure its freshness and optimal benefits.
Now that you’re equipped with the knowledge and inspiration to create your own goat milk chapstick, it’s time to get started. Gather your ingredients, follow the detailed instructions, and enjoy the satisfaction of making a lip balm that is tailored to your unique needs and preferences.
Thank you for joining us on this journey of discovering the benefits and wonders of goat milk chapstick. We hope this guide has empowered you to explore the world of natural and organic lip care and embrace the nourishing properties of goat milk. So go ahead, indulge in the goodness of goat milk, and let your lips experience the transformative benefits of this exceptional ingredient.
.


